Time for science in the time of pandemic
Of the challenges that face us during this pandemic, balancing a full time job with young children at home has to be right up there on the difficult list. Listening to my friends and colleagues, bravely managing that tight-rope act, I looked for something I could do to help. I remembered an idea that arose out of frustration over the thin science in our sons’ elementary curriculum – Science Wednesday. We did small scale science projects at home on Wednesdays, after school. Little experiments and kitchen sink inquiries designed to spark my sons’ interest and get them thinking about the natural world around them. I dug through an old hard drive and, miraculously found the ideas and notes for it, recorded way back.

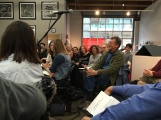
The Zoom session
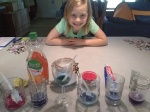
With the help of my friend, Beth Wilbur, we put together a rough plan. We’d invite the children of our friends, colleagues, and family to join us, once a week (on Wednesday mornings) for a live Zoom session. During that time, we’d review their results from the previous week and introduce the next activity to come. We’d begin with the experiments I’d used in the past, since I knew they were do-able and didn’t require fancy tools. As a test, Beth and I ran the experiments ourselves, taking notes on potential problems and photos to document our results. We came up with a template for a “Grown-up Guide” (for the parents), which included a list of required items, an outline of the plan, and a few guidance photos for each experiment.
Once we were confident we had two, easy-to-reproduce experiments, we started outreach. Very quickly, our “class” size numbered over ten – enough to get started. It was gratifying to hear the parents’ response to the idea – a bit of excitement, mixed in with a large portion of relief.
The group consisted of ages ranging from 5 to 13. Quite the spread and quite the challenge. After the first two sessions (“Water Transport in Celery” and “The Naked Egg”), it became clear that, if we aimed for the 8-10 year olds, the older kids would figure out their own extensions and adaptations, while the younger kids were happy to come along for the ride.
Two weeks into things, with 20 kids signed up, I decided to reach out to my biology-teacher friends. After all, they could do a much better job than I ever could and they’d have even more creative ideas. My request came right at the time most of them were trying to figure out how to teach their own classes online, so I kept the ask to just one session and I’d manage all the technology, handouts, and communication. Biology educators are the most generous souls and this was no exception. Soon we had a group of some of the best high school, AP, and college biology teachers in the country thinking about at-home experiments the kids could try. Here’s our star-studded line-up:
- Nancy Monson, Opposable Thumbs (How your hand works)
- Eric J. Simon, Amazing Red Cabbage Juice (pH)
- Peggy O’Neill Skinner, Seed Germination (A closer look at beans)
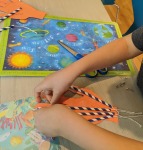
- Diane Sweeney, The Blubber Glove (Hot or Not?)
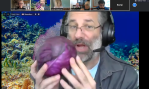
- Brad Williamson, Marine Microfossils (from Iowa!)
- Carol Williamson, Pollinators in Your Backyard
- Alyssa Wood, Penny Dirt (Copper oxide and malachite)
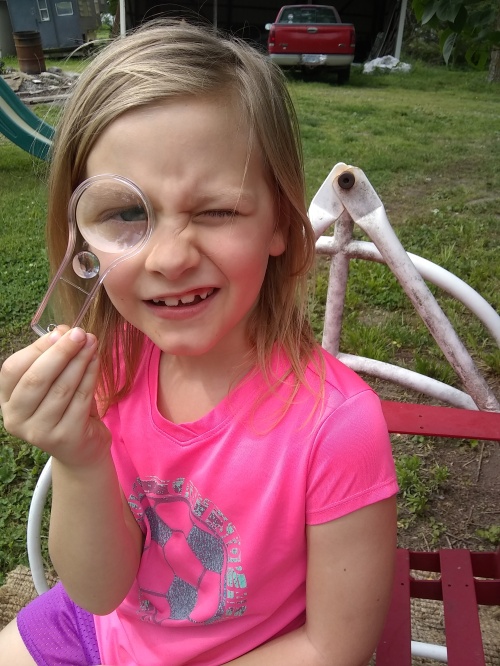
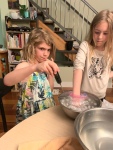
The kids were terrific and their results impressive. With each experiment, they caught onto the question and came up with their own answers, often extending their effort to include artful drawings, short video clips of their observations, and added investigations into something new that occurred to them. For example, a few of the kids planted the seedlings they sprouted on damp paper towels and then proceeded to watch them grow over weeks. They brought new tools to the table – digital thermometers, ziplock bags, flashlights, new ways to label, and methods to align a small magnifying glass to their iPhones in order to get a better look at the microfossils. Click on the photo gallery below to see these young scientists at work!
-
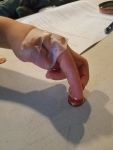
- Working without your thumb
-
- Digital thermometers to confirm precise temperature
-
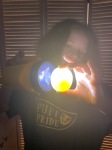
- A flash light to reveal the insides of a “naked” egg
-
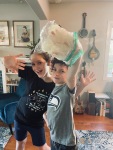
- Ziplock bags to hold the blubber
-

- Magnifying glass taped to a camera lens for finding microfossils
-
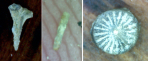
- Marine microfossils discovered
-
- Labeling each experimental condition with the object in question
-
- Using a window for labeling and light
-
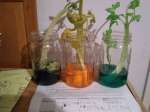
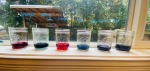
- Measuring water transport in celery
-
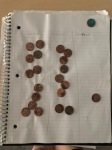
- Pennies tallied
-
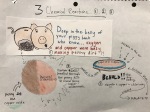
- Alyssa’s diagram of penny dirt
-
- Modeling the human hand
Eric J. Simon
The educators were pretty darned creative too. Not only did they devise fabulous inquiry ideas, but they experimented themselves and found refinements or adaptations that saved time-pressed parents from extra trips to the grocery store. Their educator superpowers were on prime display and each week I’d be impressed all over again by a new innovation or a creative way to inspire enthusiasm from a Zoom window. Carol Williamson encouraged the kids to hold up their pollinator grid to the camera if they had something they wanted to share. Peggy Skinner suggested taping their seed germination bags to the wall, at eye-level, so that they could easily
Alyssa Wood
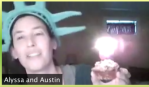
check in on progress each day. Eric Simon drew acid-base analogies that brought home the concept of pH. Brad Williamson tickled their imagination by showing the original site of the marine microfossils samples we sent to them by mail – in Iowa! Alyssa Wood brought home the concept of penny dirt (aka copper oxide) and brilliant blue malachite by showing photos of the statue of liberty and wearing a lady
Peggy O’Neill Skinner
liberty head dress during the Zoom session. Nancy Monson upped their investment in the question of opposable thumbs by showing delightful photos of chimpanzees, pandas, and possums. Carol Williamson urged the kids to explore gardens, playgrounds and nearby parks looking for pollinators and then document what they found.
We decided to end the sessions with the arrival of summer – always better to leave them wanting more, right? A few good lesson emerged from all of this:
- Keep the live sessions short and punchy (attention spans and enough Zoom already…)
- It was helpful to begin each session the same way, with a familiar patter, and a map with red stars to indicate where in the world the students lived (Luca lives in Sweden!)
- Activities with an end-product seem to foster creative flourishes (those models of the human hand!)
- It’s helpful to have a few experiments that continue, beyond a week (e.g. germinating seeds) to give the students headroom for more exploration
- Even though the plan here was to give parents a break, most of the parents stayed nearby during the Zoom sessions and got involved in the investigations themselves, which only added richness
- Flexibility was key – you can’t get your hands on dried beans? No problem, try pumpkin or sunflower seeds! No white vinegar in the house? Cider vinegar will work!
- It took kids awhile to warm up to speaking in the Zoom sessions, but by the end, they all wanted to share and many of them brought other, related items to show to the teachers and to each other
And can I just say again how fabulously creative these teachers are? I’ve had the good fortune to work with biology educators for my entire professional career and they never cease to amaze me.
Thanks, everyone. That was fun.
 Here’s how it works. First download the


 Yup, my 75-year old stepmother.


 Modern & Contemporary American Poetry