Category Archives: MIT0.111x

Production Notes: Insight Into Building an Effective Online Course

What all goes into online course construction?  How much work is it and what skills do you need?  What are the best tools for the job?  And what makes for effective online learning? The following video segments take a stab at answering these questions.

My colleague Natasha Collette and I decided to video record a conversation between us about the making of the online course Making Science and Engineering Pictures (MITx 0.111x).  The two of us worked together, with our friend and colleague, Felice Frankel (the course’s instructor), in 2015.  I’ve blogged about the course earlier – documenting the tools we used, the student voices, and the live event we staged, but these recorded conversations between us will provide behind-the-scenes insight into the course’s construction.

Video 1:  Natasha’s Background

Video 2:  Developing Effective Online Learning

Video 3:  Thoughts on Workflow and Process

Video 4;  Production Tools

Video 5: What are Motion Graphics?

Video 6:  The Importance of Telling a Story

Video 7:  Our Lessons Learned

Video 8:  The Value of the Team

1 Comment

Filed under MIT0.111x

Our MOOC Toolbox

tools_croppedThis post is about tools. As we planned, produced, and then delivered our online course, Making Science and Engineering Pictures, we put an impressive collection of tools through their paces. A MOOC, afterall, is a hurly burly place and you need a robust arsenal to keep track, keep up, and stay sane. Here’s a peek into our toolbox:

VoiceThread

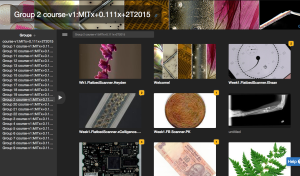
VoiceThread: This one heads the list. It’s our online tool of choice for students to share their work. Thanks to a generous commitment from VT, all students enrolled in this course have a premium VT account with unlimited uploads and the ability to download their VTs as videos. The VoiceThread environment sits outside of the edX platform but communicates directly with it through a series of carefully-crafted LTI links. When students are ready to post their work, they click on the specially created links in the course and they are taken directly to their VT account in a new window. Slick, smooth, and seamless. The good folks at VT partnered with us on the design of this hand off. They developed simple VT tutorials, they problem-solved on the best way to design our assignments, they worked with us to customize a grouping system that automatically sorts students into small VT groups (we started with 30 per group, but later upped it to 60 in order to insure adequate peer review), and they’ve helped troubleshoot the inevitable problems that crop up. I’ve long been a VoiceThread fan but I’ve really come to appreciate the richness of the tool after hours and hours spent listening/watching our student-produced VTs. The ability to narrate your work in a variety of formats (text, audio, video) is a huge boon in a course populated by citizens of the world. Not only that, but our students regularly make use of the video cam narration to demonstrate their photographic set up, adding another layer of information to their posts. The drawing tool (multi colors) helps students point out specifics in their images (the direction of light, outlines of shadows, problematic glitches on which they need advice). Students can archive their work, via video export, and thus capture their best thinking. It’s not perfect, of course. Tops on my list for future VT features – the ability to listen to comments at 2x speed, automatic import of file names when images are uploaded, and better course/group management tools (to identify students, to cross reference, and re-arrange).

edX screen shot.

edX screen shot.

edX: No tools list would be complete without an examination of the platform on which the course is delivered. I confess to a love-hate relationship with edX. On the plus side, edX’s Studio environment was very easy to work with when we built the course (changes/updates are easily made, rudimentary HTML knowledge required); it enrolls, authenticates, and manages the flow of over 8,000 students with ease (narry a problem), and it’s got a clean, uncluttered look. On the negative side, the Discussion Forum is seriously clunky; the aggregated user statistics do not render the student-by-student perspective promised by computer-assisted course management; and the one-size fits all platform structure means that each course must fit into the same box – one that rarely (if ever) suits the course’s design or visual requirements. Think step-sisters cramming their large feet into the too-small Cinderella slippers.

google_docs_logo_and_iconGoogle Docs: Yup, I’m a complete google docs lover. Our course development team has an online, shared filing system with nearly 100 documents. Diagrams, spreadsheets, and simple docs are shared, commented upon, and always at your fingertips. The course TAs use spreadsheets to track our responsibilities, the trends we observe, and the problems we need to solve. We used a simple cumulative document during beta testing, giving differential access to various beta testers. Our weekly meeting notes are logged in a google doc. And my personal favorite, which I keep open at all times, is a master doc with key links, passwords, and access codes – one stop shopping. My wishlist here? Finding things is not always easy (not all of us on the team are fans) and I worry about loosing important bits and pieces or what happens when google servers are down (which did happen once, briefly, during the course).

skypeSkype: Our meetings are all conducted on Skype. There are usually five of us online together (the instructor plus four TAs). We typically don’t use the video cam but we regularly share our screens. Most recently, we talked through a number of student VT submissions together. I played the student’s work on my screen, sharing with the others, while Felice explained her observations and guided us as to the most appropriate feedback to provide. Problems here? Bet you can guess. Dropped connections, poor sound quality, and the occasional complete bork.

emailEmail: Between the five of us on the course team, our partners at VoiceThread, and our compatriots at MITx, we keep up a steady patter of email. A typical day for me means sending upwards of 50 course-related emails. Often it’s a real-time conversation with emails flying back and forth. I also archive emails that serve as summaries on major course decisions or a “paper trail” on progress. Old school, but pretty darned reliable. Everyone in the class also received updates from VoiceThread, via email, when new comments or posts had been made.


DropBox: We use this tool for exchanging (large) video files and archiving key course documents.

Pages: Felice Frankel, the course instructor, used Pages to create storyboards for the tutorial videos.

After Effects: Natasha Collette, our videographer, used this editing software to create the course’s video tutorials. Motion graphics with still images, transitions, titling, special effects, illustration insertion – the results are stunning, very high production value.

Camera Software: We each have a different story here, depending on the camera in use but what a difference it makes to be able to view your photos, as you take them, on your laptop screen and instantly upload for analysis and tweaking.

Photo Editing Software: I don’t have Photoshop, the tool of choice for serious photographers, but have made good use of the free, online photo editor Pixlr.

Padlet: We’ve come to identify various students by the object or device they are photographing – thus we have “strawberry guy” and “the fruit fly gal”. With so many VoiceThreads to keep track of, I take cover screen shots of those VTs I want to remember or bring to the attention of others. I organize all the screen shots on Padlet and twiddle around with them to make various groupings – my week 3 favorites, the community TAs comments, or VTs to discuss with Felice.
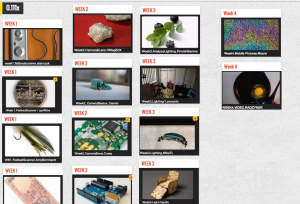
A typical collection displayed in Padlet.

A typical collection displayed in Padlet.

WordPress: You’re here. Say no more.

1 Comment

Filed under MIT0.111x

“The world’s best science should have the world’s best science images.”

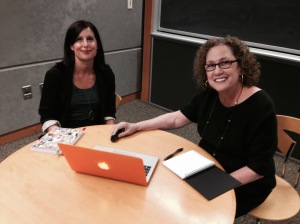
Felice Frankel with Kelly Krause

Felice Frankel with Kelly Krause

That’s what motivates Kelly Krause, Creative Director at the international science journal, Nature.

During week 5 of our course, Making Science and Engineering Pictures, we staged a live event on the MIT campus. Felice Frankel arranged to interview Kelly and bring her perspective to our students.

In an online course like ours, where everyone participates independently, on their own time, you look for opportunities to bring everyone together synchronously, to foster a spirit of community. In our initial course plans, we hoped to host one such live, synchronous event per week but quickly realized it would be better to do one, with just the right person, and do it well.

Kelly Krause was a welcome addition to the course content. As Creative Director at Nature, she is intimately involved in the development and selection of graphics for the weekly journal (online and print). Her design background and her comfort with science and engineering uniquely qualify her to shed new light on the questions and challenges our students tackle in MIT 0.111x.

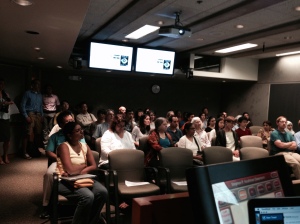
For the event, we set ourselves up in a special studio on campus (Building 9) and worked with the talented folks in the Office of Digital Learning to live-stream the event online. So, in addition to the 60 people in attendance, roughly 800 people tuned into the broadcast from over 30 countries.

Students, teachers, and researchers assembling for the live event at MIT.

Students, teachers, and researchers assembling for the live event at MIT.

It was a terrific event and we all learned so much from Kelly. She explained her career trajectory and gave us insight into the way graphic decisions are made at Nature. We learned that Nature has a Tumblr blog, Nature Graphics, featuring a collection of images from Nature, curated and explained by the art team.

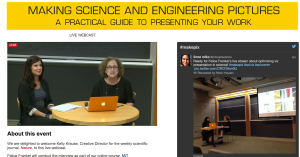
In-person audience members were invited to submit questions on index cards (collected by our course Teaching Assistants) and online audience members submitted questions and comments via Twitter. Our students did not disappoint, with questions like: “My thesis advisor favors graphs, do you have any advice for convincing him of the importance of images?”; “What do you think of the images coming in from of the dwarf planet, Pluto?”; and “What advice do you have for images to represent math or other abstract disciplines that do not have objects to photograph?”

It was an interesting and thought-provoking afternoon. Many thanks to Kelly Krause, to our technical crew from the Office of Digital Learning, and to the people who joined us from all over the world. For those of you unable to attend, the video is archived here.

Archived livecast of the interview with Twitter transcript (#makepix).

Archived livecast of the interview with Twitter transcript (#makepix).

1 Comment

Filed under MIT0.111x

Weeks 2 and 3: Making Science & Engineering Pictures

Week 2:  Camera Basics

Week 2: Camera Basics

The second and third weeks of our course, Making Science and Engineering Pictures (MITx0.111), are the most challenging. It’s here where the students dig into the inner workings of their cameras and grapple with the relationships between aperture, exposure, lighting, and depth of field.

Video tutorials for weeks 2 and 3 show and tell the basics while interactive tools give learners the opportunity to twiddle and work through what-if scenarios.

Zoom in on the same object taken at four different aperture settings.

Zoom in on the same object taken at four different aperture settings.

Course interactive to show changes in depth of field with changes in f stop.

Course interactive to show changes in depth of field with changes in f stop.

With the basic concepts in hand, the next step is to try it yourself. In the week 2 assignment you put your camera on a tripod and photograph your chosen object or device at a series of f stops while keeping all other parameters constant. This means setting your camera in aperture-priority mode and “stopping down” your lens from (for example) f/4, to f/8/, to f/11, to f/22 – and even down to f/32 if your camera includes that option. By fixing the camera in place (with the tripod), and keeping all other variables constant, you can easily see the differences in your images. At the larger apertures (smaller f-stop numbers) the nearer elements of your object appear in sharp focus while those at a distance from the camera remain fuzzy. But as you tighten the camera’s aperture (larger f-stop number), more and more of your image comes into focus. As photographers put it, you have a greater depth of field. As a topper to the assignment, we asked the students to remove their camera from the tripod and take one last picture, at their smallest aperture, with the camera in hand.

Students submitted their week 2 image collections on VoiceThread and then narrated their production. It was wonderful watching and listening to them as the penny dropped. “Now I get the relationship between the aperture and the exposure.” “I like this picture, taken at f/22, because I can see all the details of the circuit board at the front and at the back.” “Wow, I can’t believe how out of focus that is – I guess I really do need to use a tripod.”

Wonderfully creative, many of our students played with the assignment and experimented beyond the boundaries. One student set up his VoiceThread as a mystery by setting his object in front of a backdrop and challenging his peers to figure out the backdrop as it slowly came into focus over the course of the image series. Others submitted multiple aperture-priority series with different lighting options. Still others decided to expand their chosen objects to challenge themselves further and figure out the best way to capture odd shapes or dimensional irregularities.

The week 3 assignment asked students to photograph their object or device with a number of different lighting scenarios. Daylight, augmented with a secondary light source, and to experiment with unusual source of light. As with the week 2 assignment, we asked students to hold the other imaging variables steady in order to fully grasp the impact of altering light.

Students experimented with flashlights, LED key chains, desk lamps, candles, light boxes, headlamps, and – my personal favorite – the light radiating from a computer screen. For the students who’ve stayed with the same object or device they selected in week 1, it’s a pleasure to see how different the same object can look, depending on how the image is taken. Photographing the same device also allows us to witness the students development over time as we see the quality of their images improve.

I am quite taken with the playful and experimental nature of their approaches. A Drosophila geneticist marvels over the different appearance of her fruit flies in a blue light. A materials scientist figures out a way to change the background color by projecting colored light onto a white paper background. Many students attempt bouncing light with foam core or white poster board. One students marvels over the subtle changes in daylight over the span of the hour she spent shooting her images near a sun-filled window.

Our edX platform statistics tell us how many students view each of our course videos everyday, but it’s far more revealing to hear the language of the video tutorials pop up in the students’ narration of their own work (diffuse, bounce, negative spaces, horizon…) and to notice Felice’s suggested strategies appear in their work (a curved paper background, pairing objects, attention paid to the camera’s angle). Evidence of their learning appearing like footprints on a beach.

Assessment in this course happens all along the way. It’s a continual part of the learning. And our students are acquiring knowledge in multiple venues – from the course’s video tutorials, from the sample assignments, from the work of their peers, from the comments of their peers, and – most importantly – from their own experiments.

We Teaching Assistants (TAs) divide up the VT groups between us and attempt to provide timely feedback, while the images they’ve taken are fresh in their minds. Most students get VT comments from at least one TA and two or three peers. The quality of the comments vary, but the ones I’m the most grateful to hear are those that ask an informed question, make an intriguing observation, or refer the student to another VoiceThread that might shed some light on a problematic issue.

I can tell that our students are transferring their knowledge from one week to the next, building on what they’ve learned and applying what they see in the work of others. They are engaged in complex work, they have flexibility with regard to when and how they do the work, they engage with each other, and there is a real sense of mastery coming through.

1 Comment

Filed under MIT0.111x

Student Voices in MITx0.111x

0.111x VoiceThread environment

0.111x VoiceThread environment

Flatbed scanner

Flatbed scanner

Our online course, Making Science and Engineering Pictures, has just wrapped up week 1 and we are rolling into week 2 (of 6 weeks total). Week 1 marks the first photographic assignment: choose a small object (3-10 cm) and create an image of your object using a flatbed scanner. It’s a great way to begin a course like this, designed to encourage creative thinking about visual representations, because most people don’t think of a scanner as a photographic device. We encouraged the students to experiment with different backgrounds, different resolutions, or with the scanner cover on/off.

And the students did not disappoint. Examples of their creativity start with the amazingly eclectic range of objects selected – clothespins, currency, dismembered iPods and chargers, moss, flowers, agate, shells, soil samples, watch parts, cut fruit, beads, pine cones, fishing lures, flashing headlamps – you name it!  Since many of our students are scientists or engineers, they are photographing the devices used in their research – microfluidic devices, electrode holders, circuit boards, magnets, silica gel, and experimental set ups. Their backgrounds were also quite clever – cleaning cloths, woven mats, paper, felt, lab tape, box tops, marble, and even chem wipes. The images are terrific – as rich and varied as the students enrolled in the course.

We opted to use VoiceThread as our image-sharing environment. Students link out to VT from the edX platform and are automatically and randomly sorted into small groups of 30. There they create a VT by uploading their images and commenting on them (in text, voice, or using their videocam). VoiceThread includes a drawing tools feature that allows you to sketch on the image, while commenting, to point out particularly interesting features.

Here’s a short video showcasing our students’ creativity:

The assignment includes the charge to comment on the VTs of others in your group, guided by a rubric provided in the assignment.  When it works well, each student receives a few comments that might include questions or requests for clarifications (“what’s the resolution?”, ” how did you get that shadow effect?”). On the whole, the students’ comments have exceeded our expectations, going well beyond simple praise to asking questions (“was it worth scanning at such a high DPI?”), making suggestions (“what if you tried taking the image with two of them, side by side?”), and pointing out opportunities for further exploration.

I really enjoy listening to the students’ narration of their work. The many accents (our course includes students from 133 countries around the world) and the technical language they use, revealing their professional and academic backgrounds. I’m struck by the clever ways they use the technology to amplify their posts. For example, one student recorded his narration using his videocam, holding the photographed device in his hand, and demonstrated for us (in a macro sense) how he oriented the device on the scanner bed.

Of course there are technical issues (aren’t there always?) – students sorted into multiple groups, not remembering to comment, failing to name their VT in a way to make it easy to find. But, on the whole, it’s really working remarkably well. To date we have over 100 VTs in our class group – each one a rich and meaningful exploration of their images.

2 Comments

Filed under MIT0.111x